Is your Des Peres home truly ready to impress luxury buyers the moment they see it online? Preparing a high-end property can feel overwhelming, especially when you want a fast, clean sale at a strong price. With a clear plan, you can highlight what today’s buyers value most and present your home with confidence.
Below, you’ll find a practical 60–90 day staging roadmap tailored to Des Peres. You’ll learn which rooms to prioritize, how to plan your vendor timeline, what visual assets to capture, and how to measure results once you hit the market. Let’s dive in.
What Des Peres buyers expect
Des Peres attracts buyers who value privacy, mature landscaping, and a move-in ready lifestyle. In the luxury segment, they typically expect high-quality finishes, spotless maintenance, and inviting indoor and outdoor living.
- Turnkey presentation: kitchens and baths that look updated and clean.
- Lifestyle cues: entertaining spaces, a calm primary suite, work-from-home options, and finished lower levels.
- Scale and proportion: furniture that fits larger rooms and highlights square footage.
- Quality systems and storage: smart-home tech, energy efficiency, organized closets and garages.
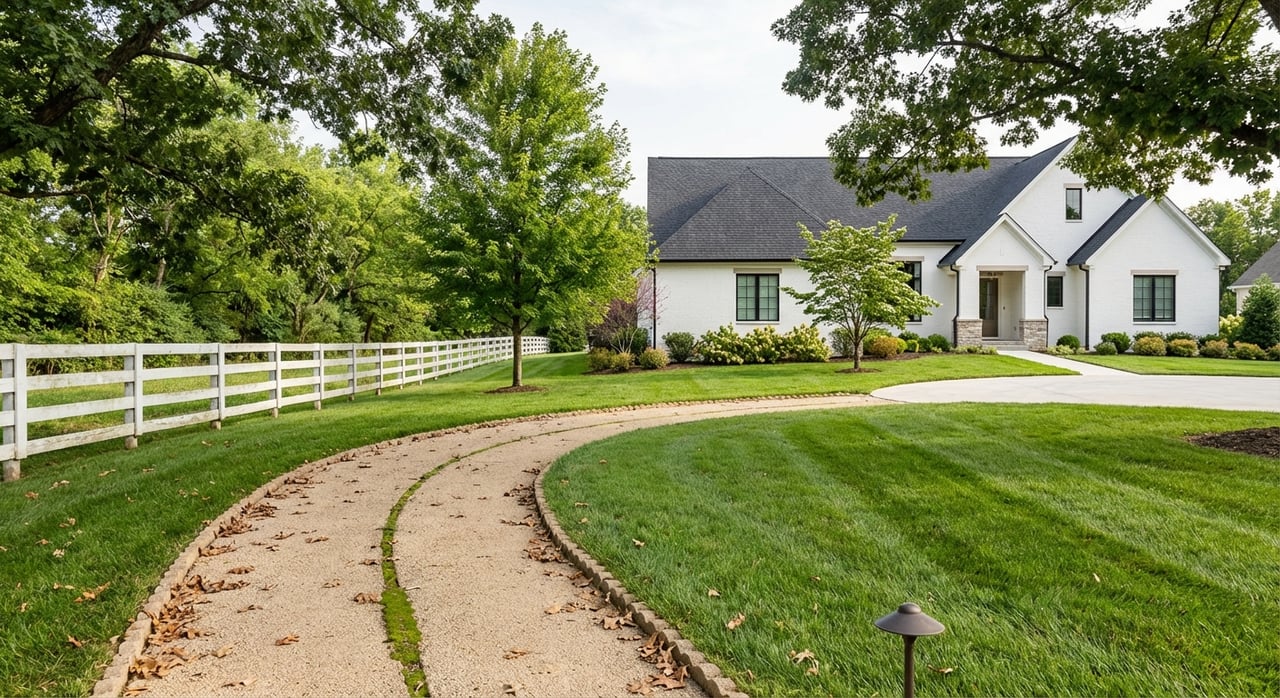
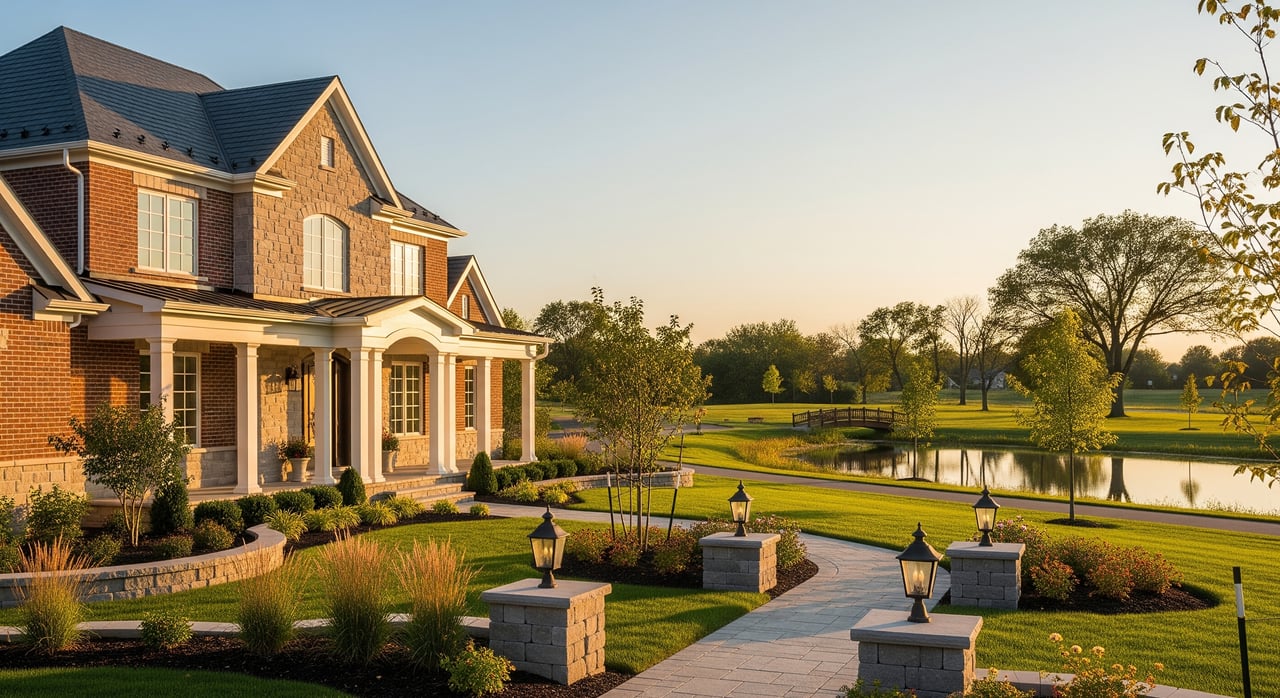
- Curb appeal and privacy: manicured lawns, healthy trees, trimmed beds, clean driveways, and warm exterior lighting.
Online first impressions matter. Your exterior and “hero” interior images often decide if a buyer requests a showing. Professional photography and accurate floor plans are expected at this price point. Small visible defects can undermine value, so plan to address them before listing.
Stage by priority: rooms that sell
Focus your effort where buyers make pricing decisions. These areas set the tone and justify value.
Front entry and curb appeal
- Clean, prune, mulch, and edge the lawn. Repair or replace exterior lighting as needed.
- Clear driveways and walkways. Hide trash bins and toys.
- Repaint or refinish the front door if worn. Add simple, quality porch seating.
Kitchen
- Clear counters of clutter. Keep only a few high-end accessories like a cutting board, a bowl of fresh fruit, or flowers.
- Remove magnets and papers. Polish appliances, fixtures, and hardware.
- Highlight island seating and work zones with good lighting.
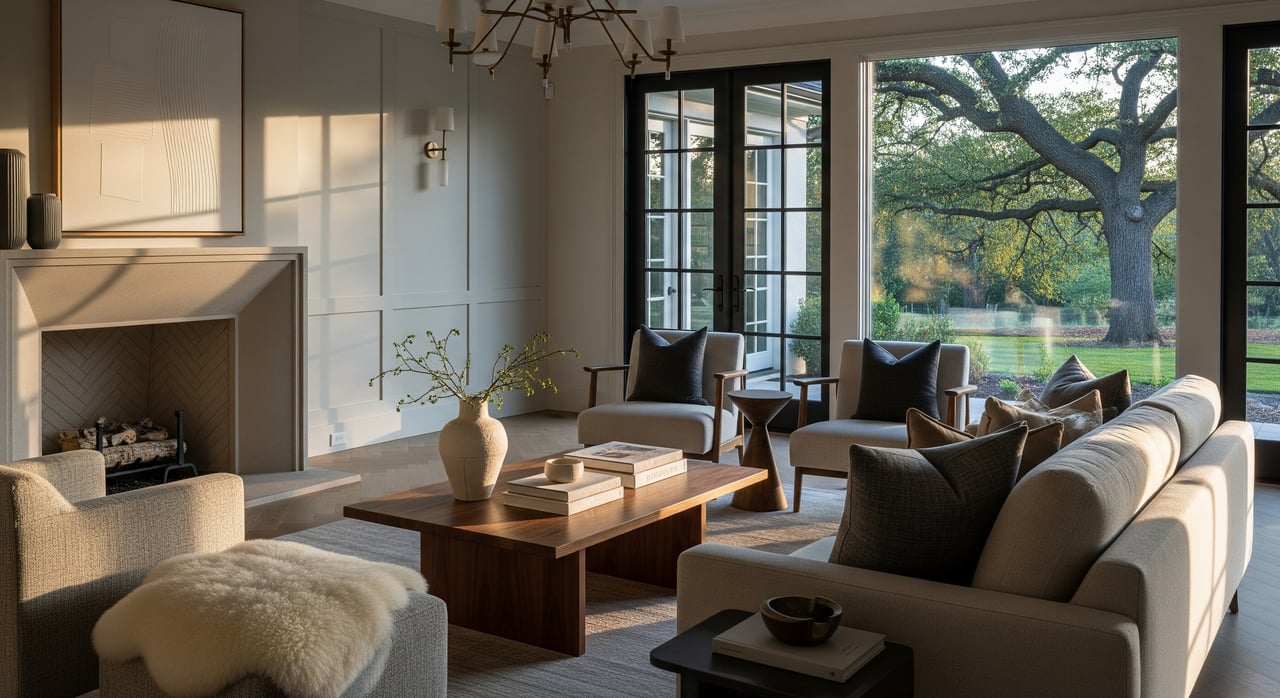
Great room or primary living area
- Right-size rugs and sofas to match the room scale.
- Create a conversational furniture grouping that shows flow to the kitchen or patio.
- Remove low-quality or mismatched pieces that pull the room down.
Primary suite and bath
- Aim for a hotel-like feel: quality bedding, layered pillows, and bedside lamps.
- In the bath, style with fresh towels and simple spa accessories.
- Repair grout and caulk. Polish mirrors and fixtures.
Dining and formal spaces
- Set a simple, elegant table. Use quality linens and a single centerpiece.
- Keep surfaces clean and décor restrained.
Outdoor living and landscaping
- Stage seating and an outdoor dining zone. Clean the grill and patio surfaces.
- For pools, ensure water clarity and a tidy deck. Add subtle evening lighting.
Specialty rooms
- Home office: a clean desktop, ergonomic chair, and neutral styling.
- Theater, gym, or wine room: stage to the intended use without overfilling the space.
- Avoid converting bedrooms into niche uses that reduce perceived flexibility.
Storage spaces
- Edit closets and the garage to show capacity and organization.
- Keep shelves tidy with consistent hangers and labeled bins if needed.
Secondary spaces
- Bedrooms: neutral bedding and minimal décor.
- Finished lower level: show a media or game area and a clear entertaining layout.
- Utility areas: clean, organized, and free of obvious repair needs.
Visual presentation and deliverables
High-caliber visuals elevate perceived value. Plan these assets after staging is complete.
- High-resolution photography: front and rear exteriors, kitchen, great room, primary suite, specialty rooms, and notable finish details.
- Twilight exterior: ideal for homes with landscape and architectural lighting.
- Drone or aerial imagery: useful for larger lots, privacy, and context. Confirm local rules and certified operators.
- Floor plans: at least 2D, 3D if possible.
- Video walkthrough: short cinematic or an agent-guided tour for social and listing pages.
- Virtual tour: helpful for remote buyers. Follow MLS rules and label any virtual staging.
Photo styling checklist
- All lights on and bulbs matching. Blinds open and beds made.
- Clear counters and floors. Replace towels with clean, folded ones.
- Remove personal photos, papers, visible cords, and pet items.
- Hide bins and cars. Add fresh flowers or greenery.
Order of operations
- Complete all repairs, painting, and staging first.
- Finish with a professional deep clean and window wash.
- Schedule photography 1 to 3 days after staging. Book vendors early to secure dates.
Your 60–90 day staging plan
Use this phased schedule as a starting point and adjust based on scope and vendor availability.
Phase A: Days 1–7 — Consultation and planning
- Agent and stager walkthrough to identify repairs, paint, and staging scope.
- Get bids from the stager, photographer, contractors, landscaper, and cleaners.
- Reserve rental inventory for furniture, rugs, and art.
Phase B: Days 8–28 — Repairs and prep
- Handle small fixes: hardware, paint touch-ups, grout and caulk, fixture updates.
- Repaint bold rooms with quality neutrals, starting with focal areas.
- Deep clean carpets or refinish hardwoods if needed.
- Boost curb appeal: prune, mulch, mow, power-wash, and confirm exterior lighting.
- Declutter and depersonalize throughout.
Phase C: Days 21–42 — Staging install and styling
- Deliver and place furniture per the staging plan.
- Install art, adjust lighting, and fine-tune accessories.
- Walk through with your agent and stager for final tweaks.
Phase D: After staging — Photography and collateral
- Complete interior, exterior, drone, and twilight shoots as applicable.
- Produce floor plans, virtual tour, and video assets.
- Set showing instructions, signage, and lockbox.
Phase E: List and show
- Go live within 24 to 48 hours after photos to leverage momentum.
- Consider a broker preview or agent-only showing based on strategy.
- Monitor feedback and adjust small items quickly.
Compressed 60-day plan
- Prioritize visible cosmetic updates over major renovations.
- Overlap tasks only when the staging will not be damaged.
- If large updates are required, adjust timeline or price expectations.
Vendors, contracts, and cost drivers
Line up your team early and ask for itemized bids.
- Certified luxury stager or designer with relevant portfolio.
- Professional real estate photographer with high-end lighting expertise.
- General contractor or handyman, painter, and flooring pro.
- Landscaper, exterior maintenance, and window washer.
- Furniture and art rental companies.
- Drone operator and videographer as needed.
- Professional cleaners for deep clean and pre-showing refresh.
Cost varies with square footage, number of staged rooms, rental length, quality of furnishings, delivery and install labor, and custom pieces like art or rugs. Luxury staging often requires larger, higher-quality furniture and more rooms, which can increase budget. Ask for line items that cover consultation, per-room stage fees, delivery, monthly rental, de-install, and insurance.
Contracts and insurance
- Staging contract: inventory list, delivery and removal dates, rental period, and responsibility for damage or loss.
- Photographer agreement: resolution, delivery timeline, usage rights, and any exclusivity terms.
Measuring success after you list
Track outcomes against comparable properties to see the impact of your staging and presentation.
- Days on market versus similar listings.
- Number of showings each week and the content of agent feedback.
- Time to first offer and total offer activity.
- Sale price relative to list price.
- If available, compare to unstaged comps in your segment.
Practical checklists for staging day
Use these quick references before the photographer arrives.
Pre-shoot checklist
- Lights on, matching bulbs, blinds open.
- Beds made, rugs straight, cords hidden.
- Counters clear with a few curated items.
- Toilets closed, towels fresh, trash removed.
- No cars in the driveway. Pets and pet items out of sight.
Room-by-room quick list
- Entry: clean path, neat welcome mat, minimal décor.
- Great room: right-size rug, conversational seating, accent lighting.
- Kitchen: bare counters except a few quality pieces, polished appliances.
- Dining: simple table setting and a single centerpiece.
- Primary suite: crisp bedding, bedside lamps, restrained pillows.
- Primary bath: clear counters, spotless glass, folded spa towels.
- Office: tidy desk, neutral papers, ergonomic chair.
- Outdoors: staged seating, clean grill, pool and deck spotless.
Essential photo shot list
- Front exterior during the day and at twilight if lighting is a feature.
- Aerial or drone views that show lot, privacy, and setting when helpful.
- Entry and foyer sightlines.
- Great room hero shot and kitchen wide angles.
- Dining room, primary suite, and primary bath.
- Backyard, patio, and pool.
- Specialty rooms like office, theater, gym, or wine cellar.
- Garage or workshop if it is a selling point.
Ethical standards and disclosures
Accuracy builds trust. Do not alter images to change room size or hide defects. If you use virtual staging, follow MLS and brokerage rules and label those images clearly. Keep décor neutral to appeal broadly and comply with fair housing guidelines. For drone photography, use credentialed operators and follow FAA rules and local ordinances.
Trends to consider
- Lifestyle staging: spotlight entertaining, wellness, and work-from-home zones.
- Technology staging: neatly present smart-home devices and features.
- Sustainable touches: highlight energy-efficient upgrades where present.
- Flexible furnishings: if budget is tight, stage main living areas and the primary suite first, then add more rooms if needed.
- Broker event staging: for select properties, elevated floral or simple catering can enhance a preview, aligned with your agent’s strategy.
Ready to sell in Des Peres
With a clear plan, your home can meet luxury buyer expectations and stand out online and in person. Prioritize the rooms that sell, hire the right vendors, and capture premium visuals. Then measure results and adjust quickly as feedback comes in.
If you would like a tailored plan for your home, including vendor coordination and premium marketing, connect with The Otto Group to Schedule a Confidential Consultation.
FAQs
What is luxury home staging in Des Peres?
- It is a targeted plan to present a move-in ready lifestyle with high-quality finishes, strong curb appeal, and scaled furnishings that fit larger rooms common in Des Peres.
How far in advance should I start staging?
- Start planning 60 to 90 days before listing so you can complete repairs, install staging, and schedule professional photography without rushing.
Which rooms deliver the biggest impact for buyers?
- Focus on the kitchen, great room, primary suite and bath, curb appeal, and outdoor living, then add dining and specialty rooms.
Do I need to stage a vacant luxury property?
- Yes, full or partial staging helps buyers visualize scale and flow; virtual staging is an option but must be clearly disclosed per MLS rules.
How should I stage large lots and outdoor features?
- Define outdoor rooms with seating and dining, ensure lighting works, and keep landscaping trimmed to show privacy and usable space.
How do I choose a stager and photographer?
- Ask for portfolios of similar-priced homes, confirm experience with luxury lighting and large rooms, and request itemized bids with clear timelines and usage rights.